Blend shapes
Introduction
My goal for blend shapes was learning how to make them in blender and how to use them in Unity. In this chapter you can read about that.
Changes since last feedback round
I did not change anything on the product since then, but I did teach Ebru and Frederique how to make blend shapes on clothing.
Conclusion and reflection
I reached my goals for blend shapes and I will be able to use this knowledge in future projects and that was my wish for what I could do with what I learned. The process went well, because I had made a good plan with Lisette and Alexander and myself how to work on it. This helped with not getting overwhelmed and losing sight of the current step.
Blend shape code
In this article I will talk about what I wrote to control the blend shapes in the game.
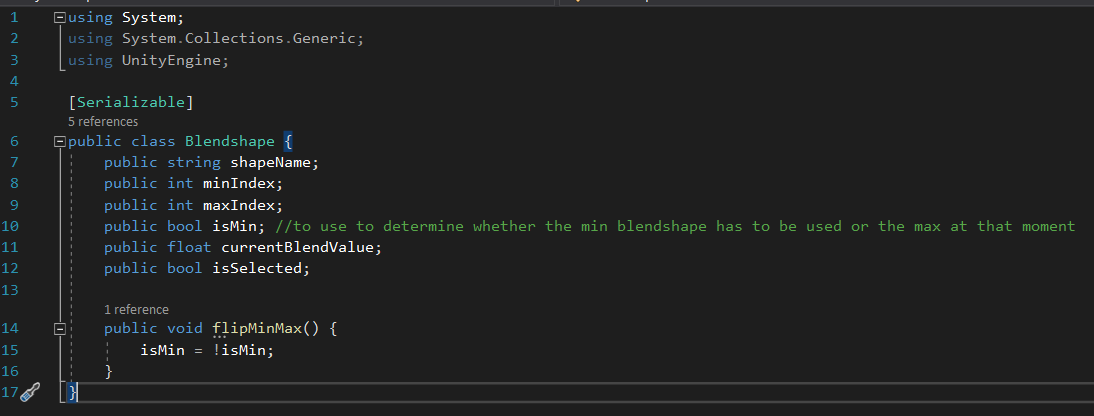
The first thing I did was making a blend shape class. I used this class to group the max and min of a blend shape and to store the value of the blend shape for later use. I also use it to find out which of the blend shapes is currently selected. It also has a method which can be used to switch between minimum and maximum values.
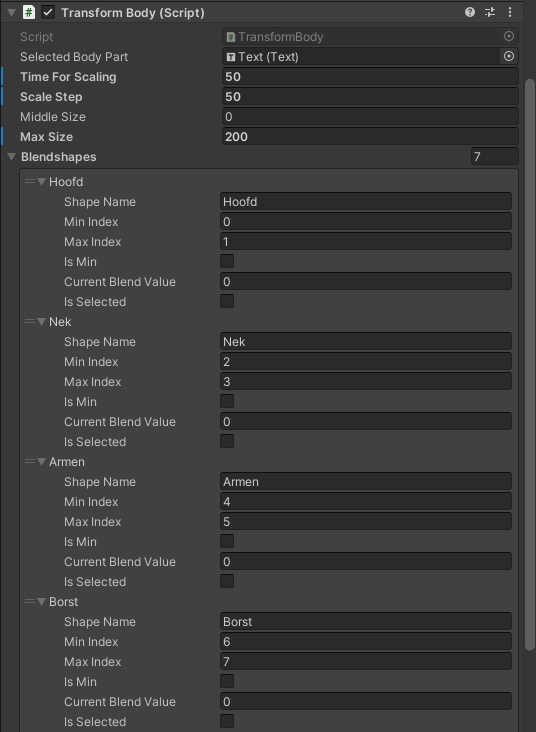
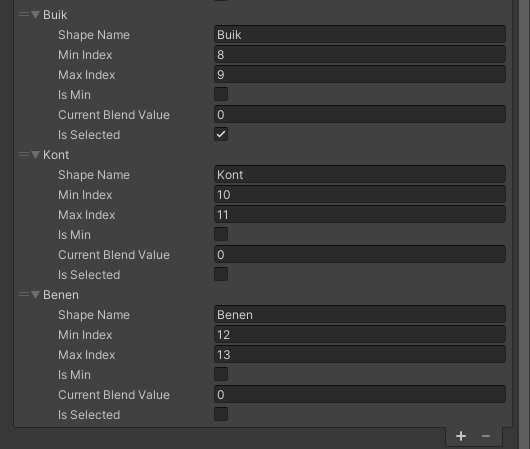
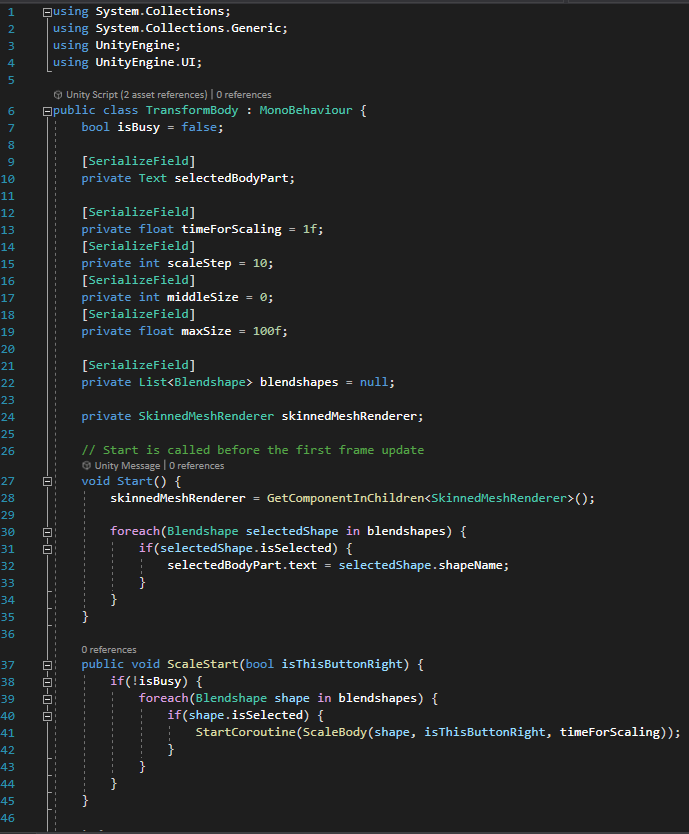
Here you can see how the transform body script works in the inspector. You can add all the different blend shapes here and tell the game what indexes they all have in the skinned mesh renderer. I also added a text component to show the current selected body part and how much you scale per button press (and also how much per lerp that is). I also added a maximum and middle size. Middle size is used to determine when there needs to be switched between maximum and minimum values. The maximum is used to know when the user is not allowed to press the buttons anymore. I also used this to exaggerate the blend shapes while testing, which worked great to help make them more visible.
Here you can see the code I wrote for the component above.The first interesting part is the StartScaling(). This is connected to the left and right buttons. If the game is not currently already scaling the ScaleBody() coroutine will be started.
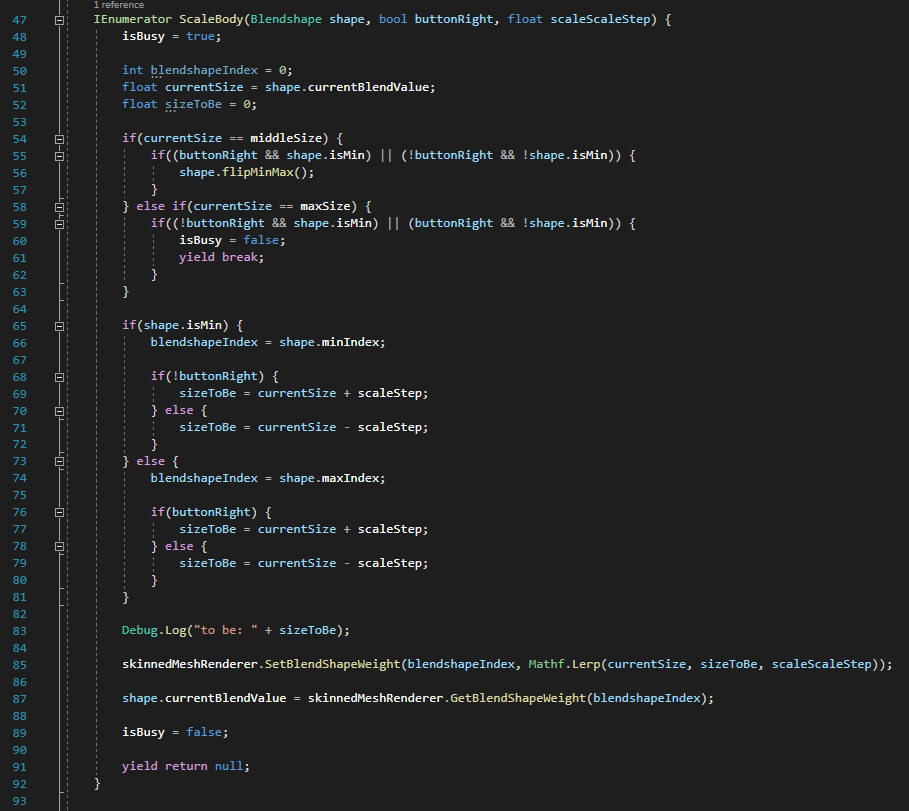
In the ScaleBody() coroutine the button that is pressed will be used to determine how the selected body part should scale. This is also where isMin from the blend shape class is used. This is because the minimum values of the blend shapes are also with a maximum of 100 instead of -100. This makes it so that the values go from 100 – 0 – 100.
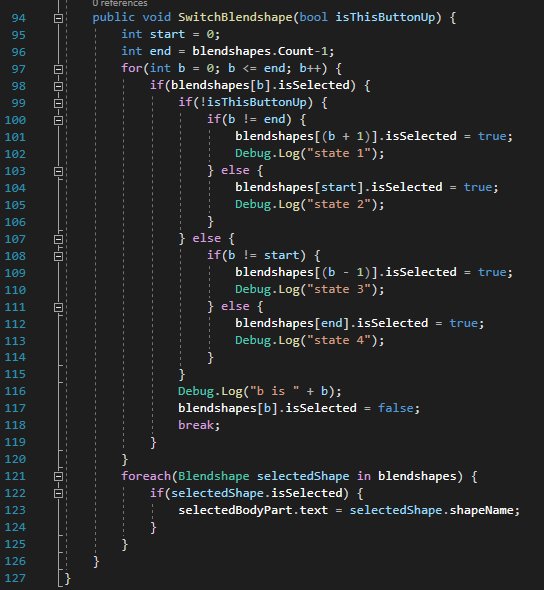
The last part of the code is where the selected body part is changed when the user presses up or down. This is done with a for-loop, where the current selected body part is found and then the next or the previous one is turned on. Then, the old one is turned off. Lastly, the text UI element that shows the selected body part is updated.
Reflection
What I learned from this is that you need a lot of logic, because I really had to use that for the last two screen-shotted parts. There were some things going wrong, which was because I used the for-loops incorrectly. I also learned that I need to do more research about how coroutines work, because my lerp does not work correctly and I also do not know when and why I need to use coroutines, I want to gain more knowledge about this.
Making blend shapes in blender
In this fourth sprint I have started making the blend shapes that we will use in the game. I started with sketching what it will look like in the game and thinking what blend shapes I want to make.
You can read more about how blend shapes work and my progression in this learning goal here: Blend Shapes.
I will still do more research on what blend shapes are needed and what sizes everything will be. On this page you can see what blend shapes I have already made (note: the min and max of every part will probably be different later on, I am still going to do research about average people’s sizes and sizes from Shoeby clothes).
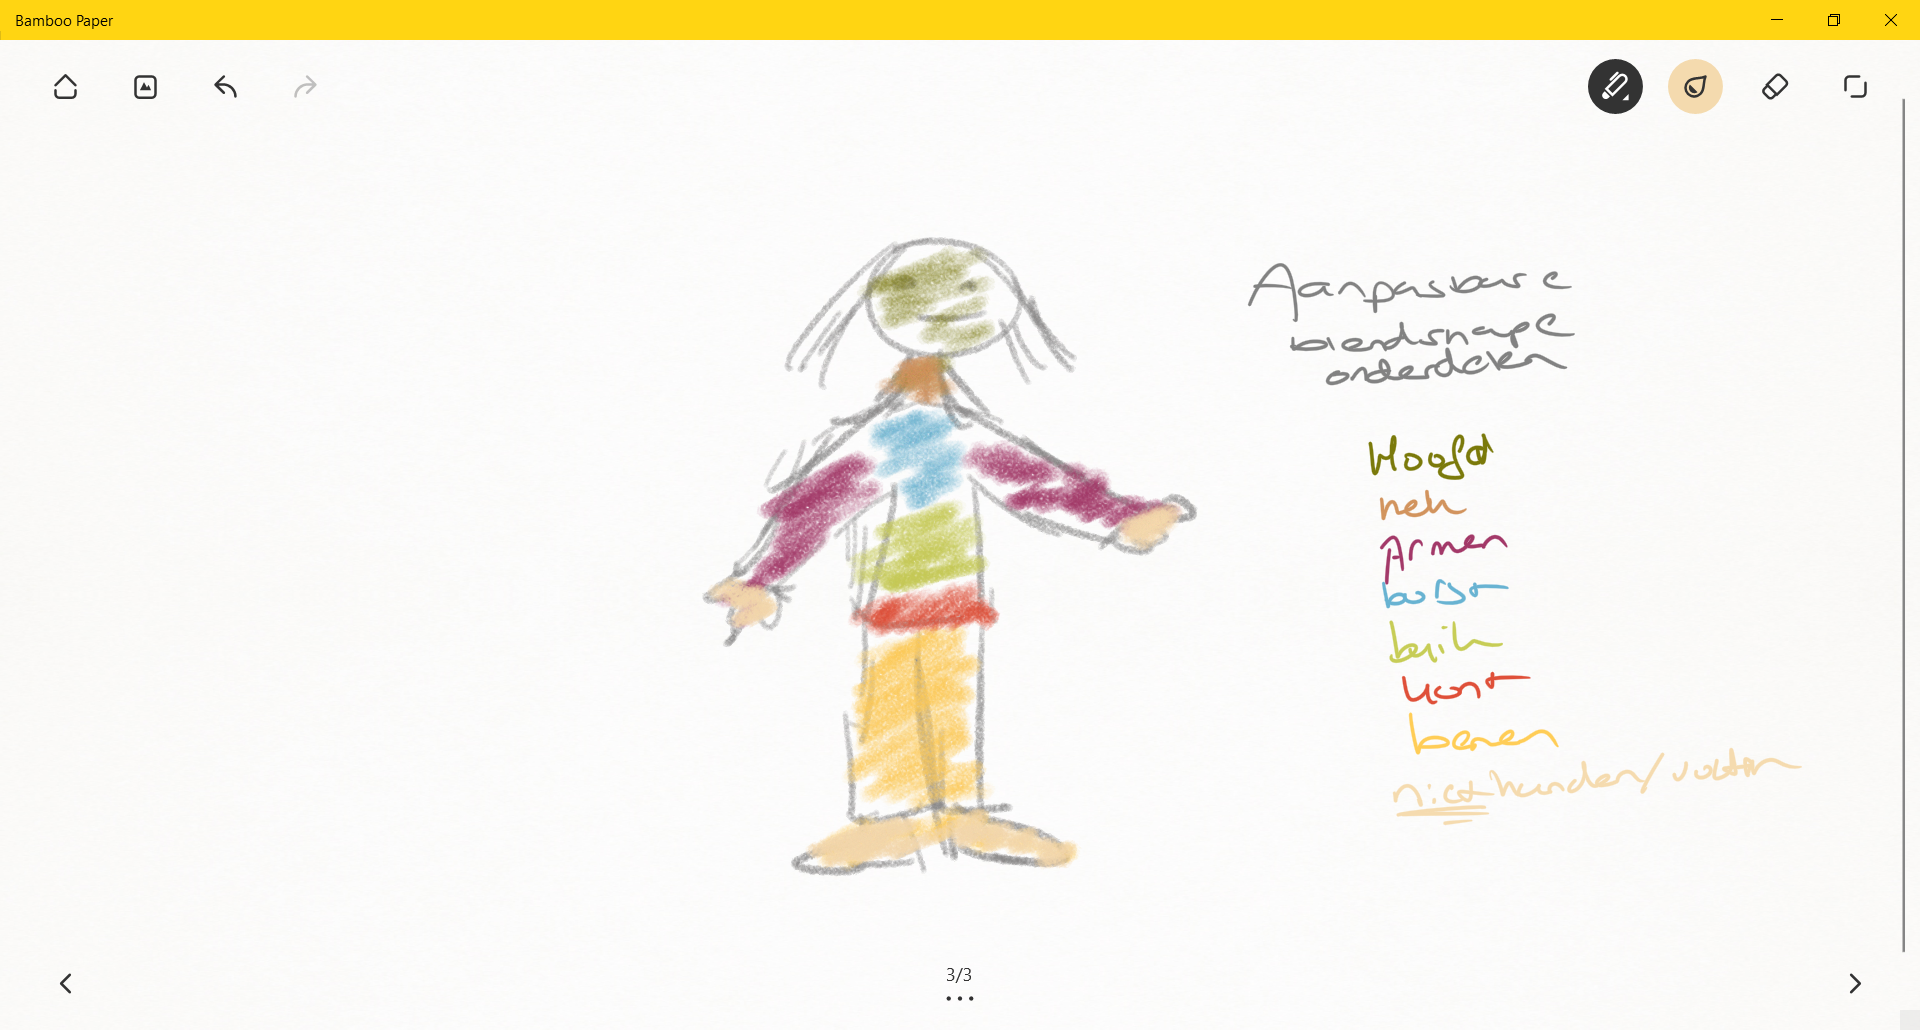
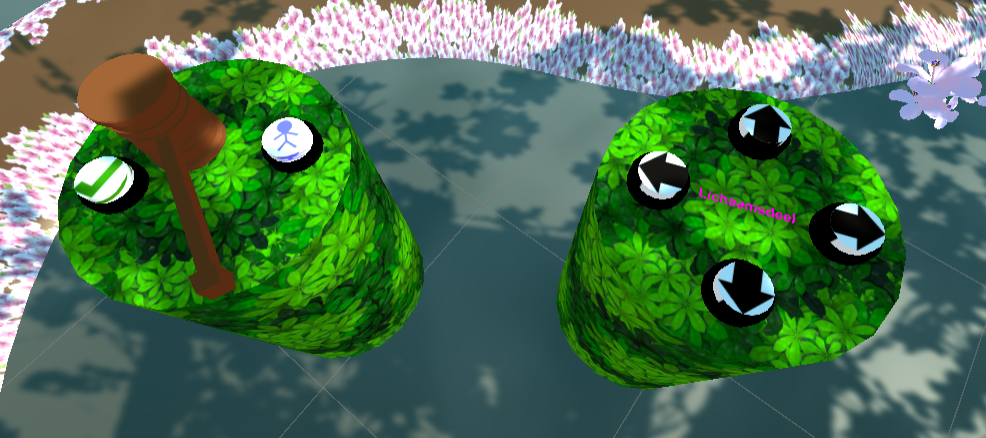
When I started thinking about the layout I started from the opinion where I wanted the player to have easy controls and be able to see the character while shaping. This is why I came up with the pillars. At first I made one pillar per button, but as you can see in the screenshot under this one we needed more buttons.
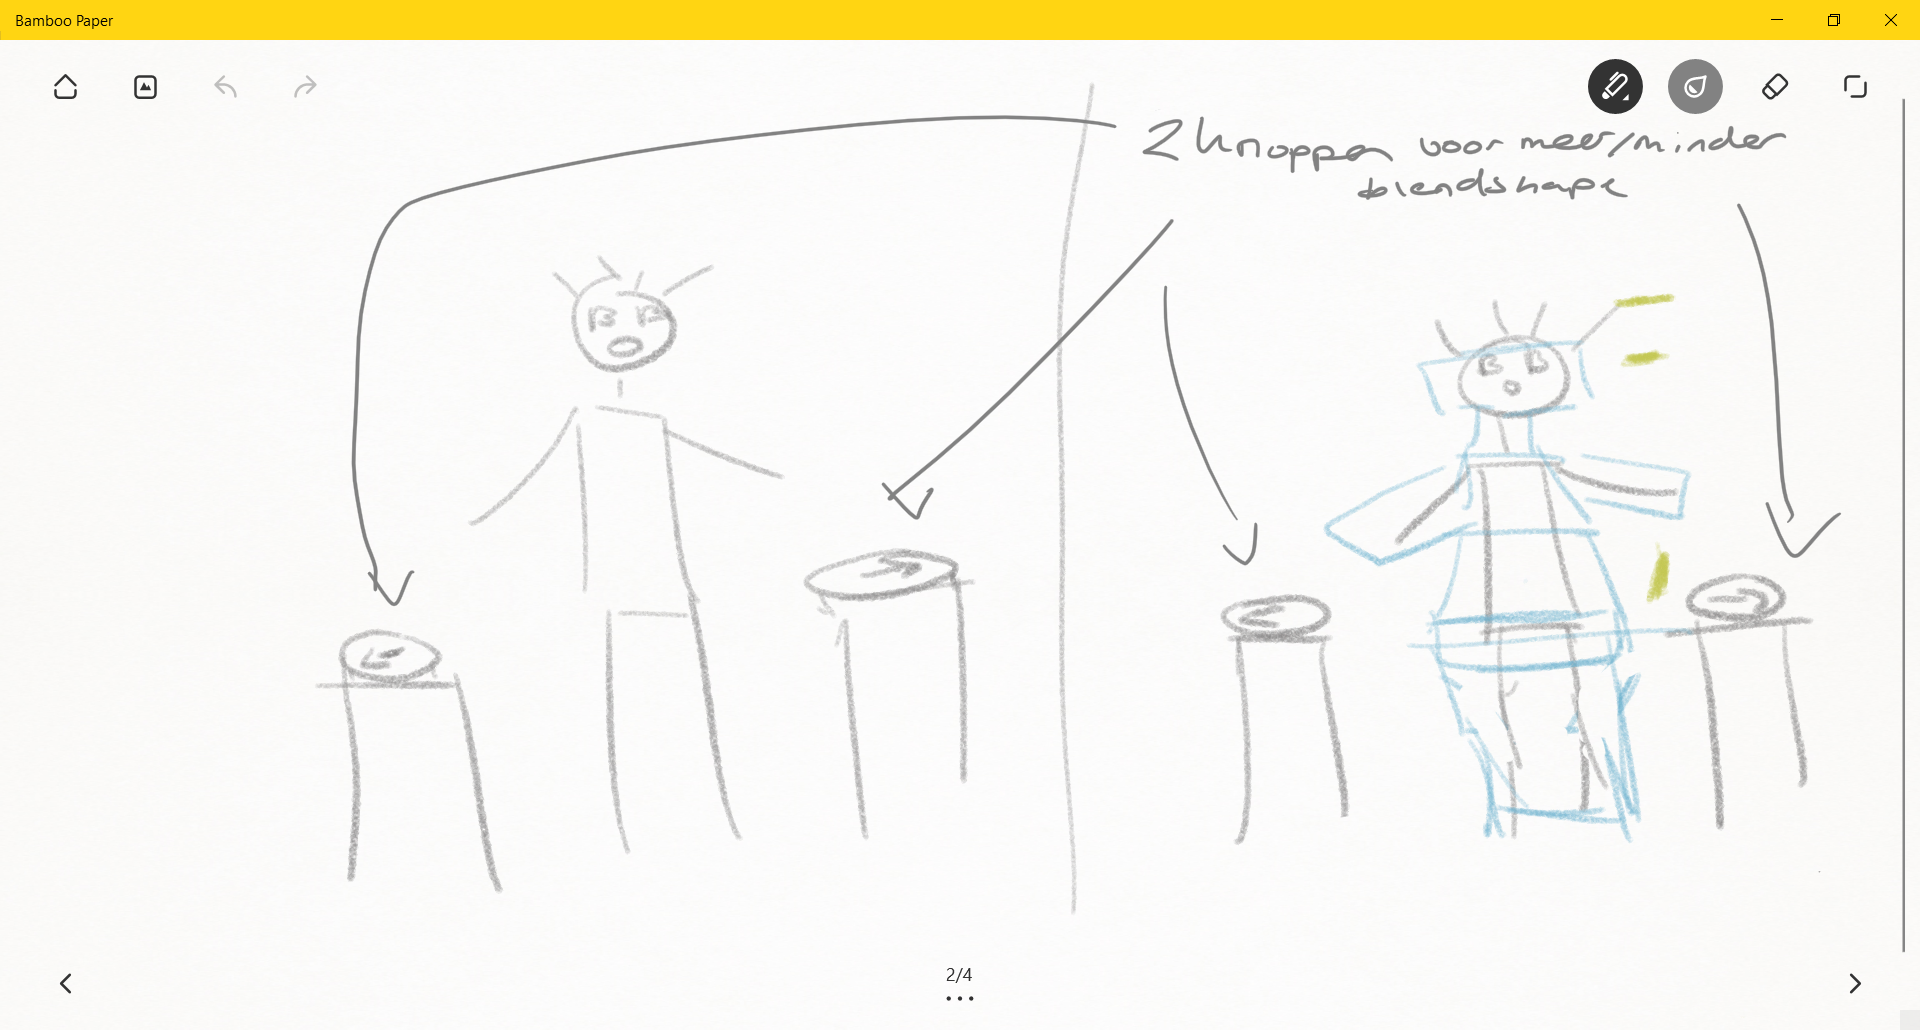
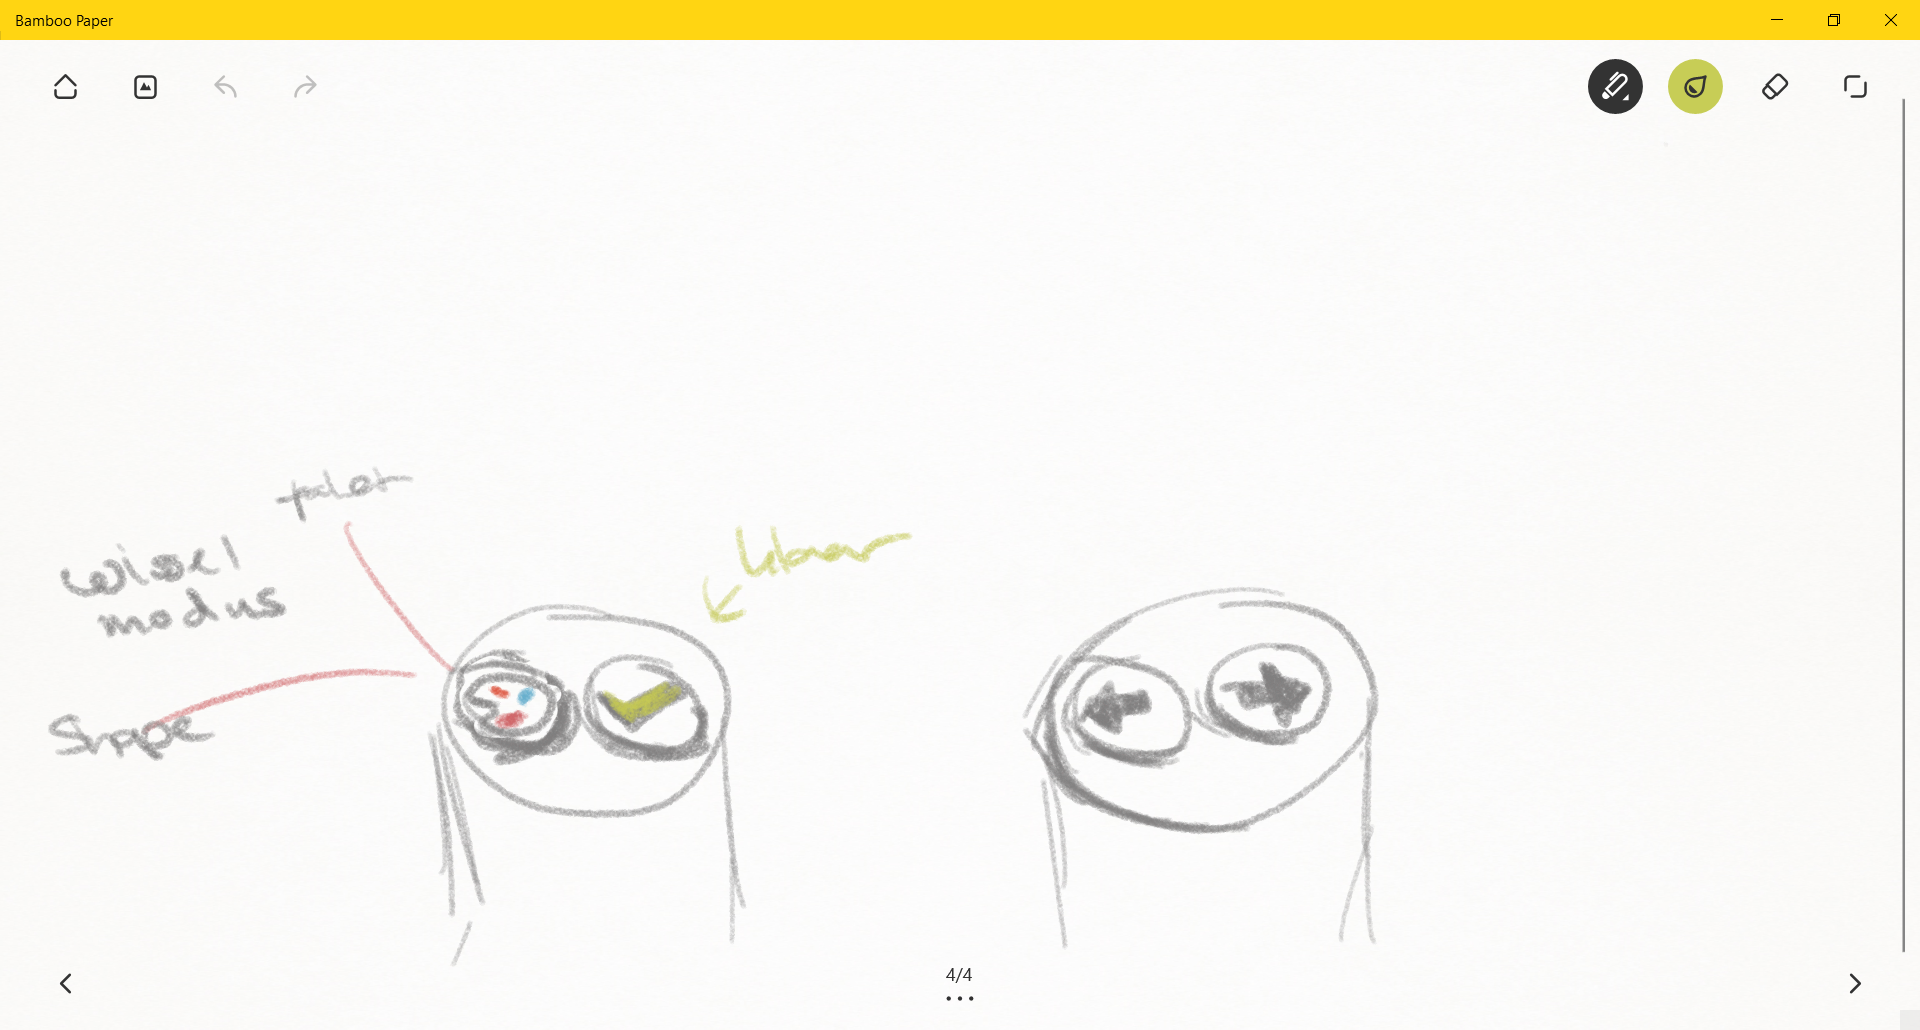
This is the sketch I made from the pillars, where I thought about what kind of functionality we needed. There is one button that changes between painting and shaping mode and the green checkmark is for going to the next sentence/stage. The arrows on the right pillar are for adjusting the blend shapes. Later during development I added two arrows for changing between blend shape selection, because we do not have enough time to develop another selection method. You can see this version in the screenshot after this one.
Below you can see the first pillars I made in Unity.
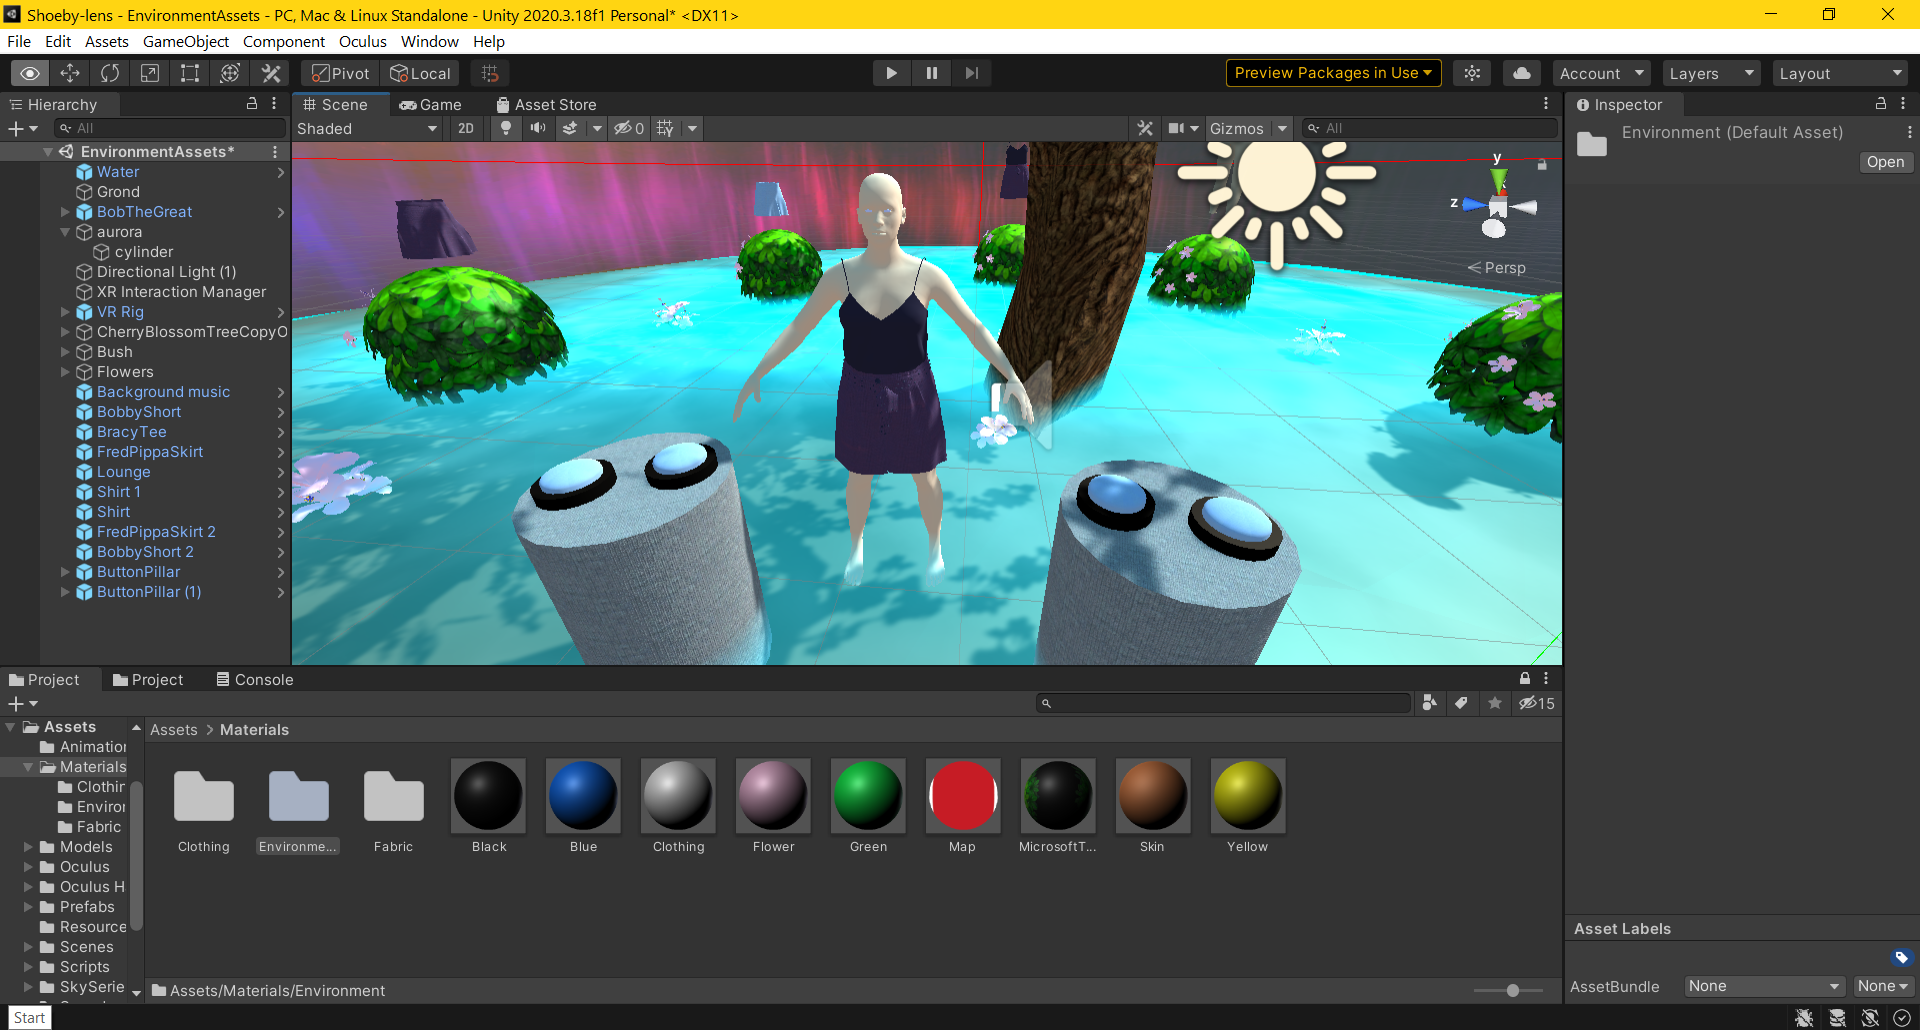
Pillars in Unity
This is the second and current version I made in Unity:
These are the first blend shapes I made. I will show you the others in Unity and paste them into the portfolio later on. I started with the neck, belly and butt, simply because they seemed the easiest.
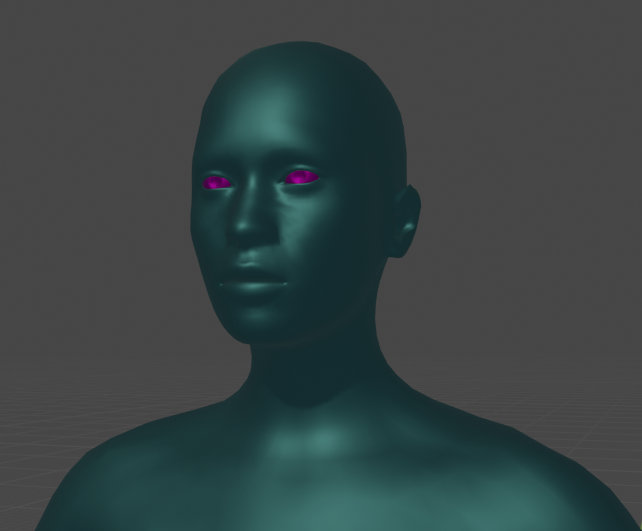
Neck min 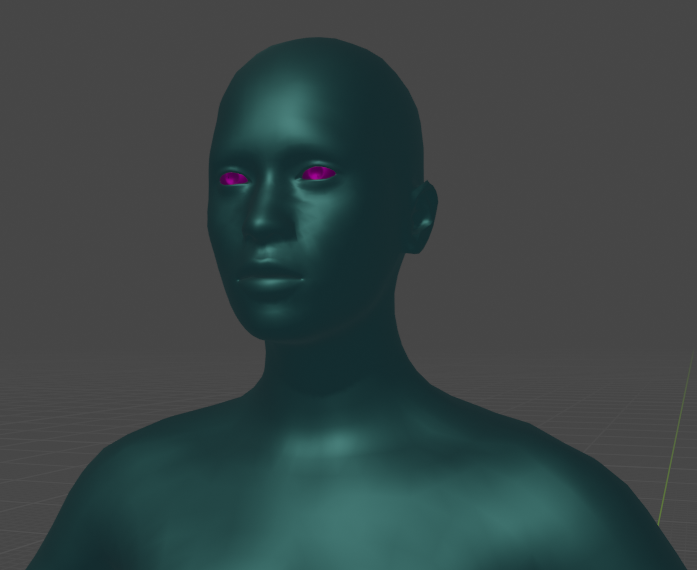
Neck average 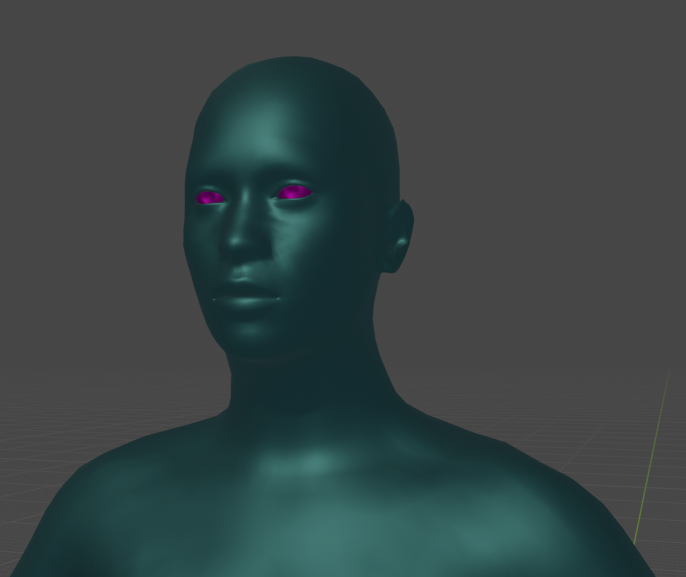
Neck max
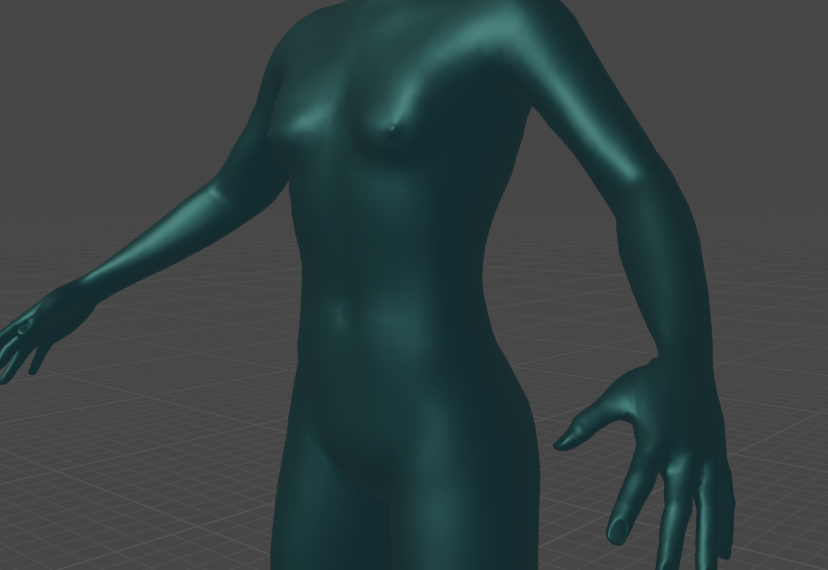
Belly min 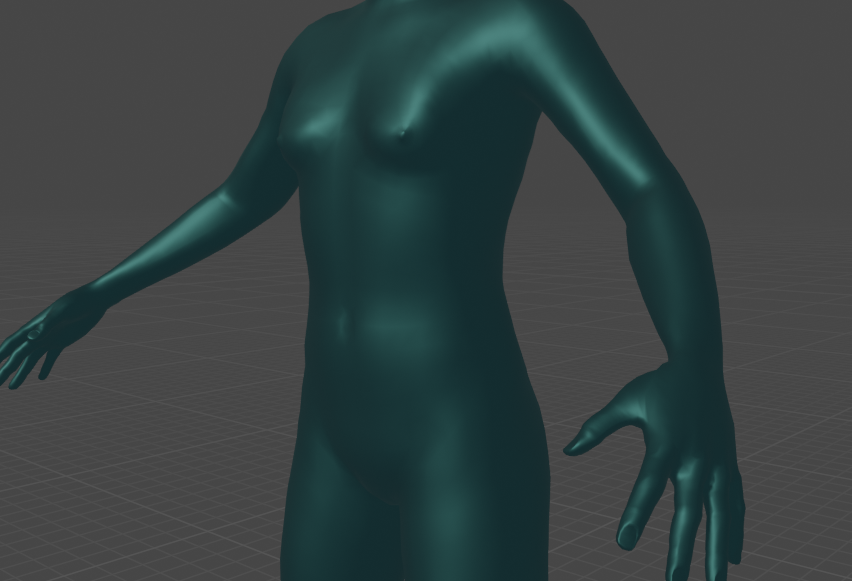
Belly average 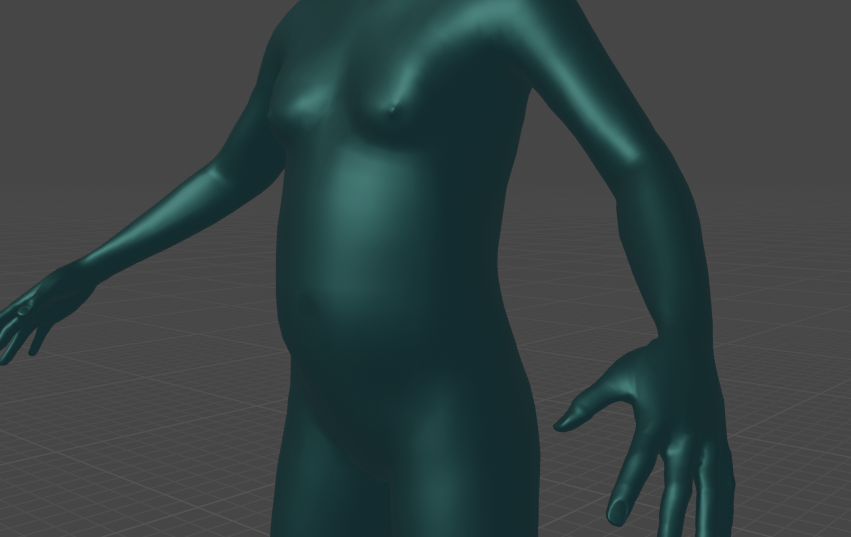
Belly max
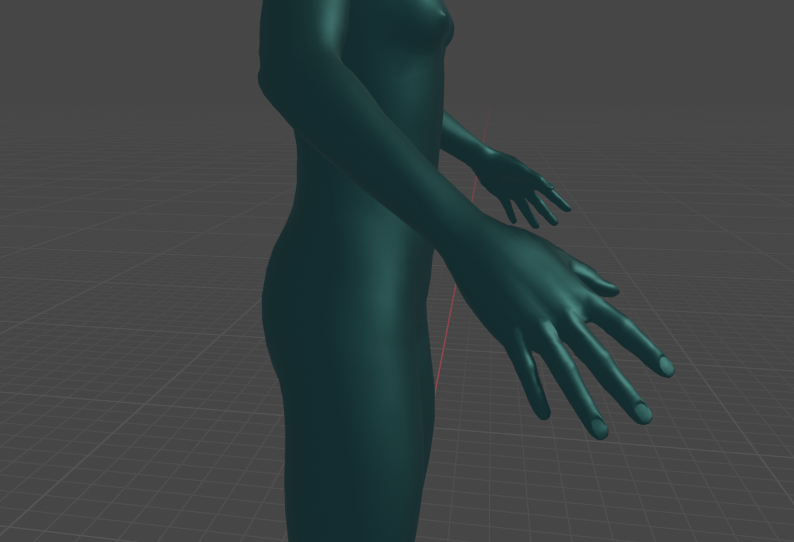
Butt min 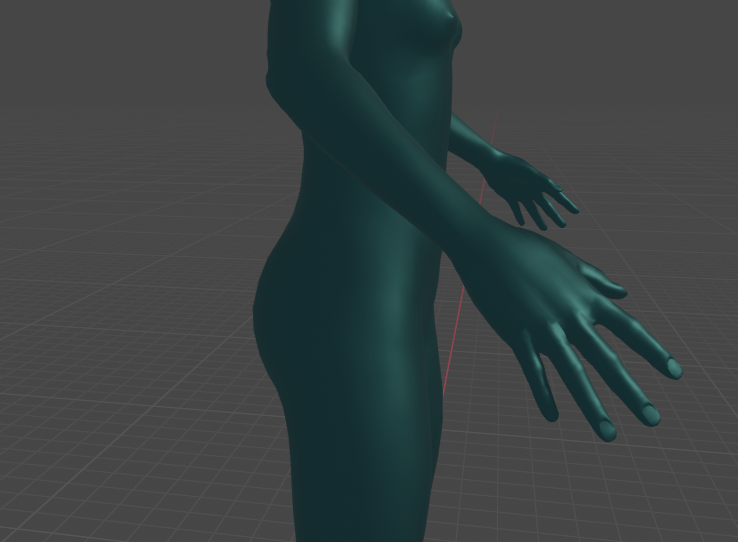
Butt average 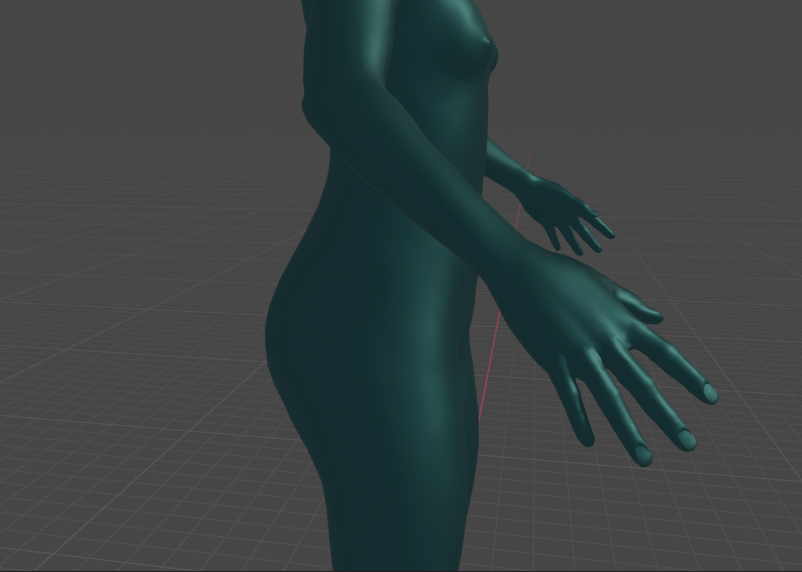
Butt max
Reflection
What I learned from this is that when you make a big part of a game there are always things that you will forget that are also a part of it. For instance I did not know that I would have to think of a new way to select a body part so that it could be programmed more quickly. I also learned that it requires a lot of thinking to make blend shapes look good and I need to get more confident in making the character, because I am having trouble modelling the character too big, because I am scared to offend people. Luckily Lisette offered to help me with this.
Importing blender clothing into Unity
While working on the dressing-up part in Unity I noticed a couple of things:
- When you grab a piece of clothing in the game it flies up in the air so you still are holding it but it is really displaced. I was really confused because I thought there was a mistake with the grabbing in Unity, but I asked the question to a teacher and he said that the centre of the object was set wrong in blender. This was actually visible in Unity, because the transform mover in the scene view was a lot lower than the object itself. I fixed this problem by first looking on Google how to edit the centre, but I did not find the answer. I probably did not know the right “blender terms” to find what I wanted. I then started to look around in blender and using logic and I found out that you can click on the centre in object mode and then click on “Set Origin > Geometry to origin”. This solved the problem!
- The second thing I noticed was when you look at the clothing in the game the inside was invisible. I already knew this was because of occlusion culling, but I did not know how to fix it. I started googling, but I did not find it that quickly. I only found results that told me how to turn occlusion culling on/off inside blender. Then I started googling by describing the problem (inside invisible) and I found this link. They said that if you want the insides of your objects to be visible you should duplicate the object and flip the normals of that object. So I did that and it worked. I do think we need to watch out with this, because it actually means that the object will have twice as much polygons. Since I am not the person who is going to export the clothing from blender I left it at this with my research, so that I could focus my time on my own tasks. I explained my research findings to Ebru and asked her and Frederique whether they can find another and better solutions which does not duplicate the amount of polygons.
- While duplicating the objects and flipping the normals I noticed that some of the clothing pieces consisted of multiple objects. This made duplicating the objects in the same spot hard for me, because blender then puts everything in the centre which makes the extra parts go in the wrong spot. To fix this I googled and found out that you can select all objects in object mode and use ctrl-j to join everything to the object selected in the hierarchy on the right.
Reflection
I learned that I still do not know enough of blender and that I really want to learn more. It is hard to look things up if you do not know the proper terms. I think I can improve on this by watching tutorials because then I will automatically get more familiar with the terms they are using. I also learned how normals work in blender (see point 2) and how to set the origin of an object (point 1) and how to join multiple objects into one (point 3).
I also learned that you can not go into edit mode in blender if you do not have a mesh selected. I thought there was something wrong but I googled it and then I found this.
Blend Shapes on clothing pieces idea
I was brainstorming how we can make the clothing fit with the right size on the avatars, because the avatar will change size with blend shapes. This means that we can not just use clothing that has standard sizes, because the blend shapes are too variable.
The solution I currently thought of is adding blend shapes to the clothing as well. If we make them the same as the blend shapes on the avatar (same minimum and maximum size and form/shape) then when a user has edited the size of their avatar we can take the blend shapes that should also be effective on the clothing and make them into percentages. Next we can use those percentages to change the blend shapes on the clothing accordingly.
Reflection
The problem with the above solution is that it will take a lot of time to make the blend shapes the same (for every piece of clothing) as the ones on the avatar. This will mean that I will have to ask others in the group to help me make them. I will also do more research in the future, but this is my first idea.
Blend Shapes
My biggest learning goal is making a character creator like in The Sims. To achieve this I started researching on YouTube for tutorials. Since I have been interested in this before I found a few videos quickly.
From these videos I chose the following tutorial because it worked with Unity and Blender and it was exactly what I wanted (making something where the user can mold their character) without too much extra things added. I also found another tutorial (shown under the first) that I will use in a later stadium if needed (this one shows how to change parts like hair on a character).
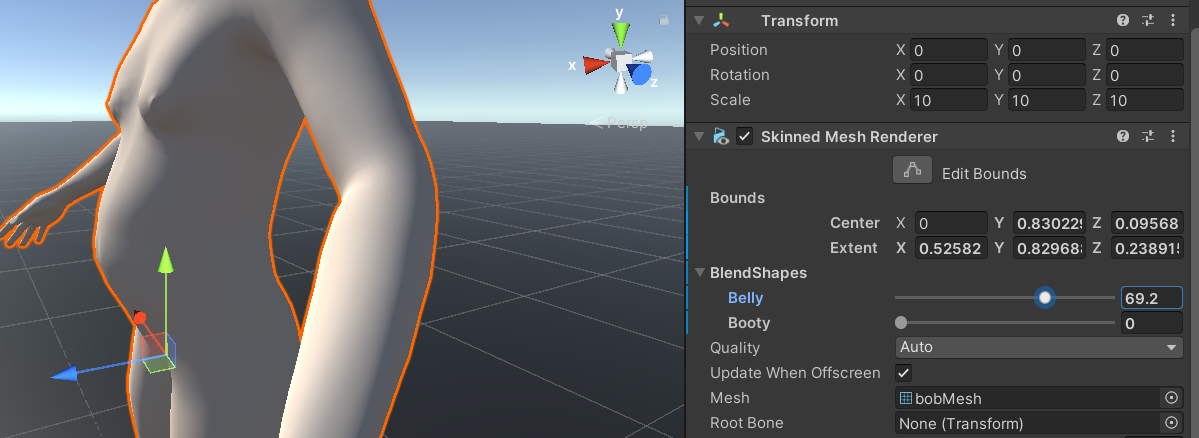
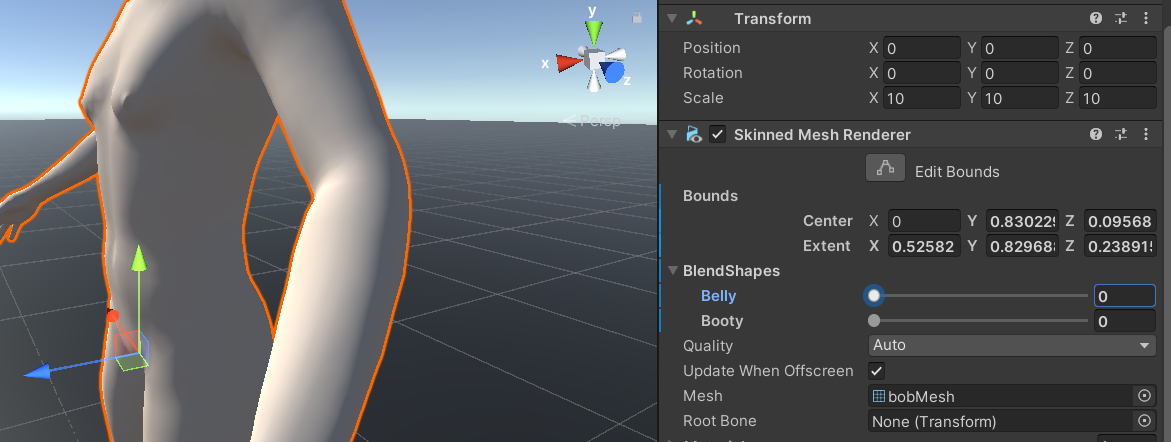
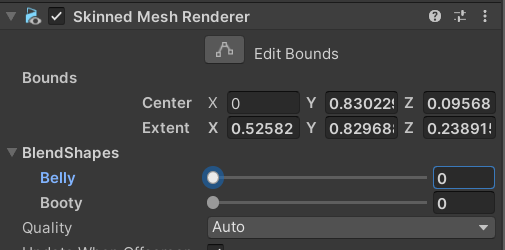
To make a character customizer like I wanted and we needed I started using blend shapes. Blend shapes are values that you can set in Blender and when you load the *.fbx that you created in Blender, Unity can read these blend shape values too. They are available in the Skinned Mesh Renderer of the character which you can see below. Since it is available here you can easily adjust them via code. I will first explain how that part works and later in the article I will explain how the Blender part works.
XR Development ->
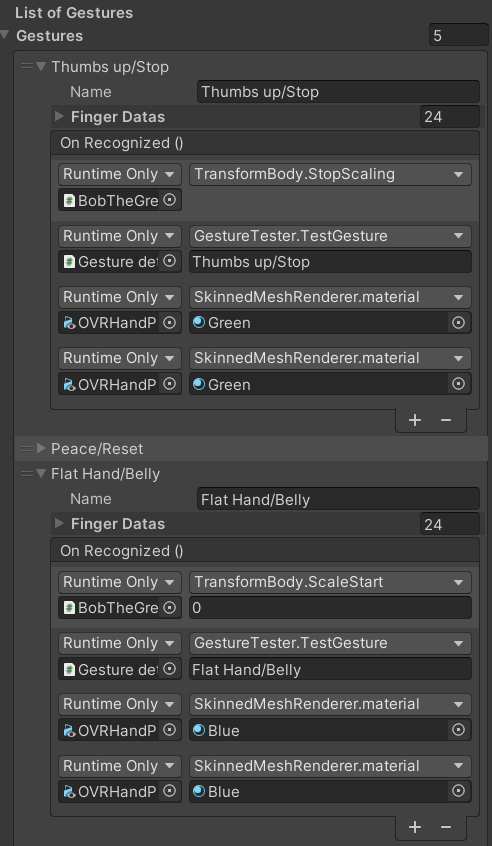
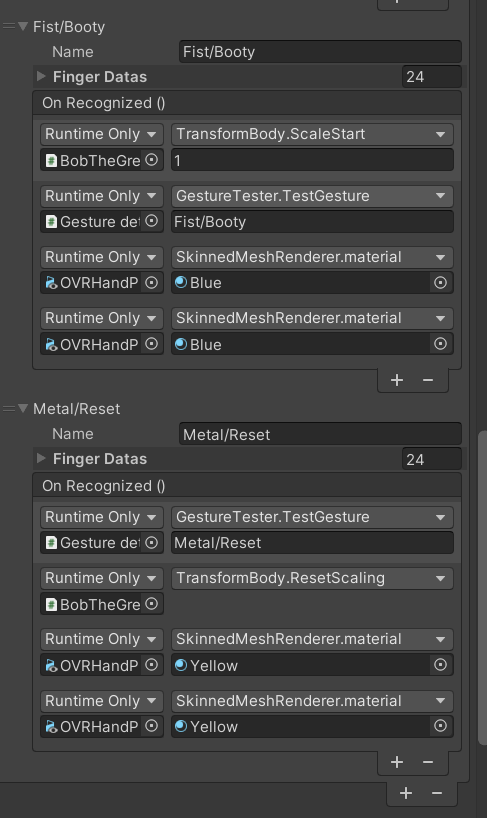
To make the character change shape we wanted to use gestures. I have another in depth article about gestures here. For our first tests this meant making a few gestures in the inspector (shown in the images below) and making them execute code when detected. Before I started using the blend shapes I first tested it out by scaling a cube based on gestures. This helped me because it was a smaller easier step before making the blend shapes.
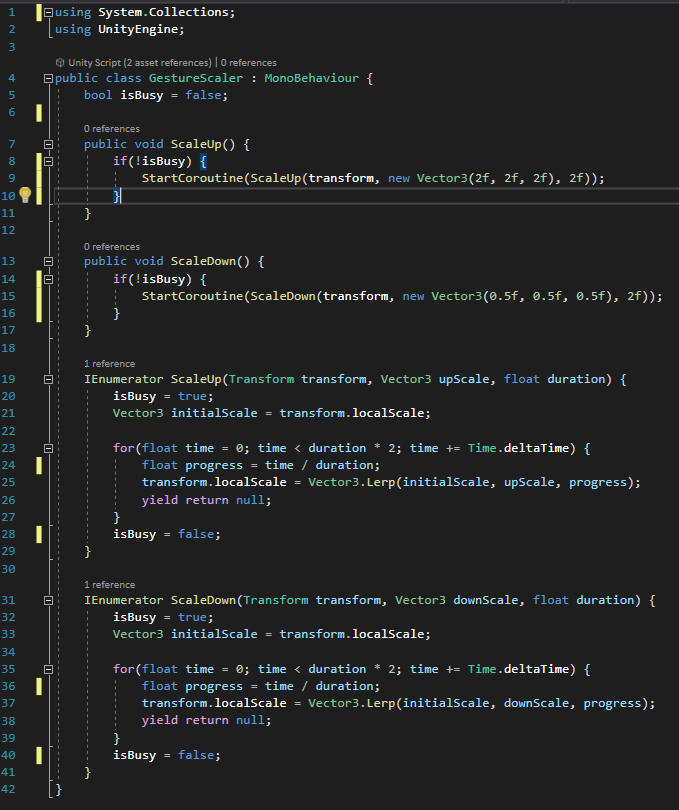
To scale the cube I made the following code:
In this code I used coroutines because I had to use time. I had to use time because I wanted to have the scaling work as follows: a gesture gets detected; while the gesture is being detected slowly scale up/down. This meant that if the gesture was showed for a shorter amount of time it did not scale as much as when it would have been a longer amount of time.
The code also takes into account that the cube may already be scaled for a bit and then lerps towards the end-amount of scaling. In the code shown here I did not implement a reset yet so there were only two scale states possible: scaling up or scaling down. After testing the scaling still seemed a bit buggy, but I went along to go and work on the blend shapes next and while testing that we also discovered that the gesture detector sometimes detects a different gesture while transitioning between gestures which makes the cube (or avatar) behave not as expected. This also came forward when we used this in our prototype during the first testing Friday.
The code below is the final code I made which works with the blend shapes. As you can see I use the Skinned Mesh Renderer component for this. I also added a stop and a reset function so that the user can reset the avatars scaling and the stop is so that they can stop the current scaling “session”, which means stop the animation or: the characters belly is now the size that I want. Another thing that changed is that there is now a field editable in the inspector which is called timeForScaling, this is the time that a full scaling can take. We used this to tweak the speed of the scaling animation.
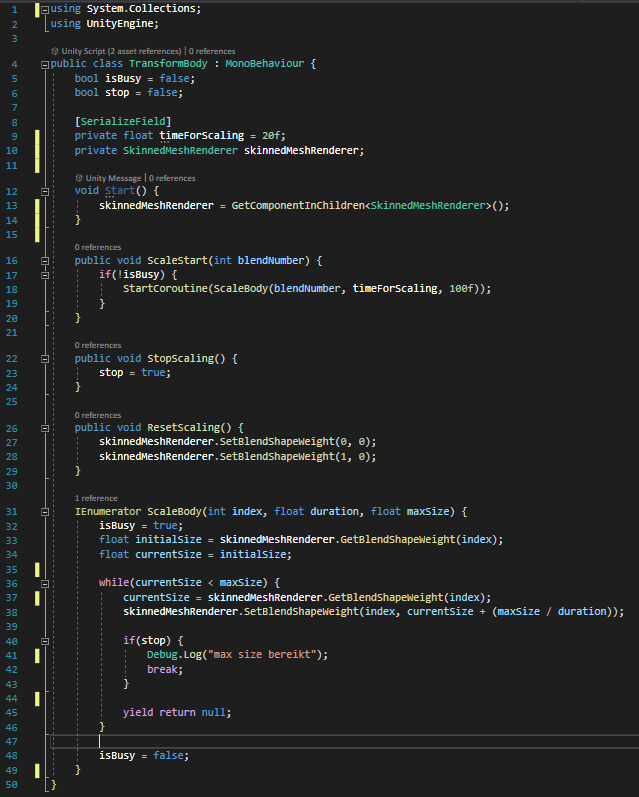
The script used to move between blend shape values. 
The script as displayed in the Unity inspector (the script is attached to the character in the scene).
XR Assets ->
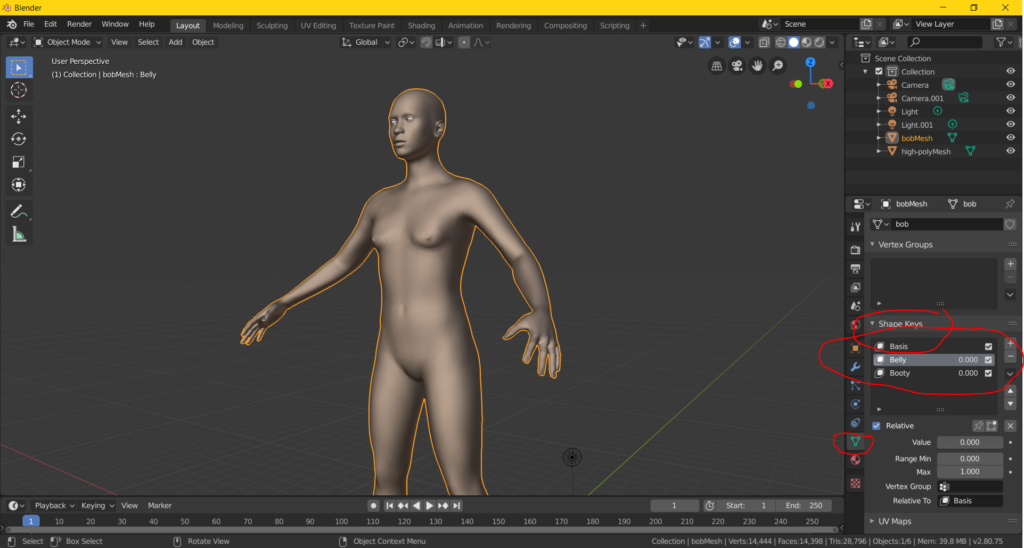
Making blend shapes in Blender is really easy. You have to go into edit mode and then click on the green icon that you see in the image. This is the tab for object data. From there you can add shape keys. While in a shape key you can edit your character as you want. Then the shape key remembers that and sees the beginning state (when you started editing that key) as the starting point for the blend shape. If you then save the model as an .fbx and load it into Unity, your blend shapes will be visible as explained above.
